AI Visual Content Studio: AI Visual Creation 101
Prompt, Edit, and Build Consistent Images with AI. This workshop walks you through prompt anatomy, the anchor-image method for staying consistent across your visual content.
Built for small screens — bite-size cards and quick checks instead of long scrolling.
Try it interactiveWhy your first image never looks right
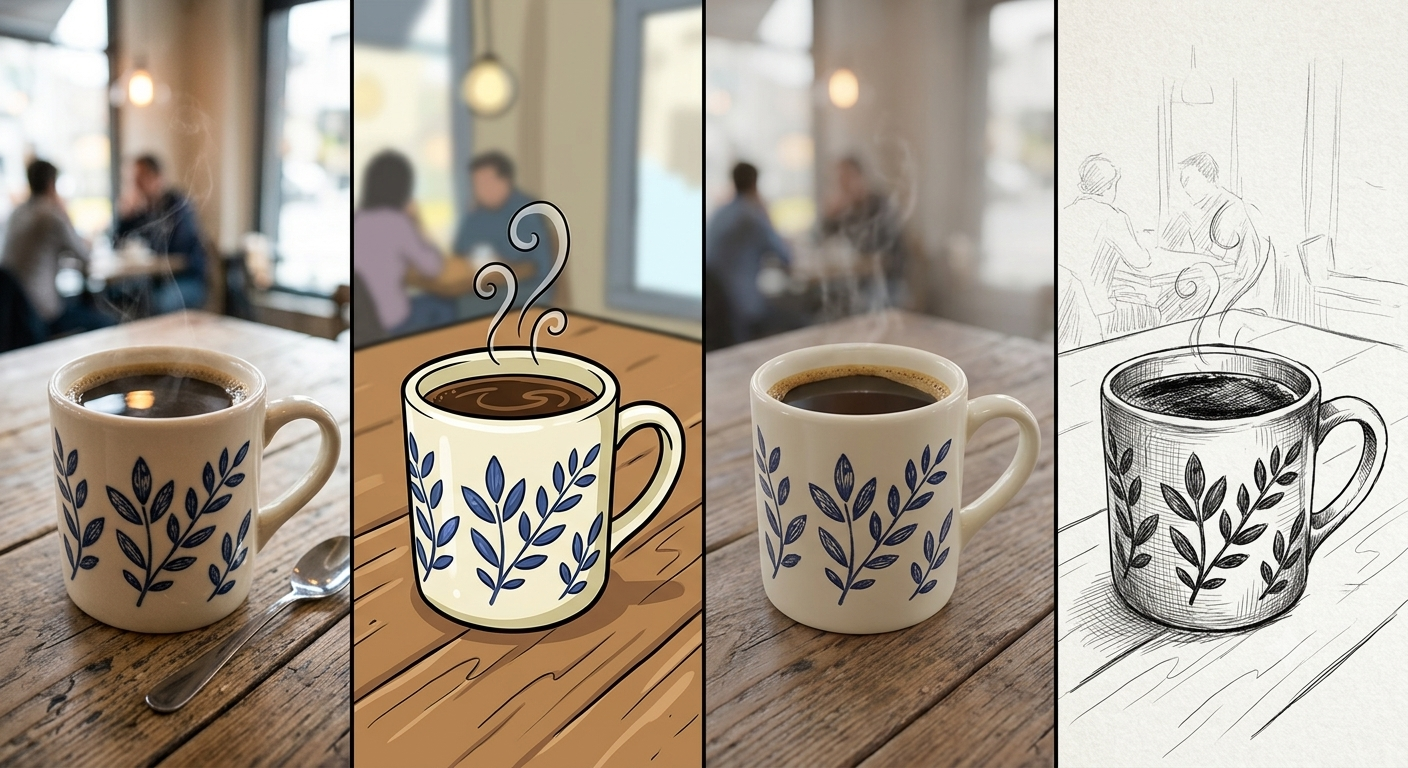
You type what you want. You get a picture back.
It's close. Not quite. Colors are off. The mood is wrong. Six fingers on one hand. The text on the sign is gibberish.
Why it keeps happening: you're treating the prompt like a wish list. "A modern coffee shop ad, exciting, professional." The model has nothing specific to work with — so it fills every gap with its most average guess.
Reality check: an image prompt needs the same anatomy as any AI prompt. Four parts:
Subject — what's actually in the frame
Style — photography? illustration? 3D render? whose aesthetic?
Composition — camera angle, framing, what's in focus
Mood & detail — lighting, color palette, the feeling you want
Miss any one, and the model picks for you. And there's a fifth lever most beginners skip entirely: reference images. Words describe. A reference image shows. The newest tools let you upload one and say "match this style" — which is often faster and more accurate than trying to describe a look in text.
The real problem: staying consistent
One good image is easy now. The hard part is three specific consistency problems:
Social. Monday's post looks like a photograph. Wednesday's looks like a cartoon. No unified feel across your feed.
Brand. Your actual brand guide says navy and gold. The AI keeps drifting toward generic blue and silver.
Series. Part 2 of your story doesn't look like Part 1. Different face. Different lighting. Different world.
Reality check: the fix isn't a better single prompt. A better prompt still drifts on the next generation. The fix is a reusable reference — an anchor image.
Anchor images: the one habit that fixes all three
An anchor image is one reference — sometimes two or three — that defines your look. You feed it back into every generation from here on, instead of starting from a blank prompt each time.
How to build one, step by step:
Generate a small batch. Write your best 4-part prompt (subject, style, composition, mood). Generate 4–6 variations.
Pick the one that's closest. Not perfect — closest. This becomes your anchor.
Write down exactly why it works. Palette, lighting direction, camera angle, character features if there's a face involved. This description becomes your reusable style brief.
Feed it forward. For every future image: upload the anchor as a reference, and pair it with your style brief in words. Most current tools support this directly — upload plus prompt, not prompt alone.
Update the anchor if the brand evolves. It's a living reference, not a one-time asset.
One habit, three problems solved. Social feed uses the same anchor → unified look. Brand colors are baked into the anchor → no drift. Series uses the same anchor → Part 2 matches Part 1.
Three ways in, plus moodboards
Creating from scratch. Text prompt only, no reference. Best for early ideation — you don't know what you want yet, so you're exploring options. Weakest for consistency, since there's nothing to anchor to.
Editing an existing image. You already have something close — a product photo, last month's post — and you want to adjust it. The newest models handle this conversationally: "make the background warmer," "remove the object on the left," "extend this into a wider frame." You're refining one image through a back-and-forth, not restarting from zero every time.
Referencing something. You upload a reference — a competitor's ad, a photo you love, your own anchor image — and ask the model to create something new that keeps specific elements (the pose, the color palette, the composition) while changing others (the subject, the setting).
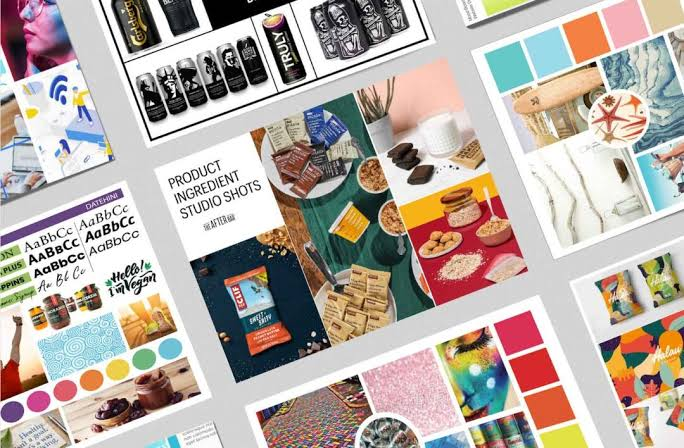
Moodboards as a starting point. This is referencing, scaled up. Instead of one reference, you combine several — one image for color palette, another for composition style, another for mood — and ask the model to synthesize them into something new. Useful when you know pieces of the look you want but haven't seen them combined yet. Several current tools are built specifically for this multi-image blending step, before you ever write a single prompt.
Prompting tips, and your first try
Six habits that separate a usable first image from a wasted one:
Be hyper-specific, not vague. "Warm golden-hour lighting, shot from a low angle, shallow depth of field" beats "nice lighting."
Describe what you want, not what you don't. Models are unreliable at excluding things ("no people") — describe the scene you do want instead.
Iterate, don't restart. If the output is close, refine it conversationally — "keep the composition, warm up the colors" — rather than writing a whole new prompt.
Lock your format upfront. Aspect ratio and resolution matter for where the image will actually live — square for a feed post, wide for a banner — decide before you generate, not after.
Generate variations before you commit. Most tools let you batch several options from one prompt. Compare, then pick — don't settle for the first result.
Keep a prompt log. When something works, save the exact prompt and reference image combination. This is your growing recipe book — it's what makes the tenth image faster than the first.
Try this now — copy, adapt, generate:
"[Subject], [style — e.g. 'flat lay photography' / 'soft 3D render' / 'editorial photograph'], shot from [camera angle], [lighting description], [color mood], [aspect ratio]. No text unless specified."
Example filled in: "A ceramic coffee cup on a marble counter, soft editorial photography, shot from a top-down angle, warm morning light, cream and terracotta tones, square format. No text unless specified."
Run it. Generate four variations. Pick your favorite. That's your first anchor image.
The tools — free, paid, and what each is actually for
No single tool wins everything. Here's the honest map, as of mid-2026:
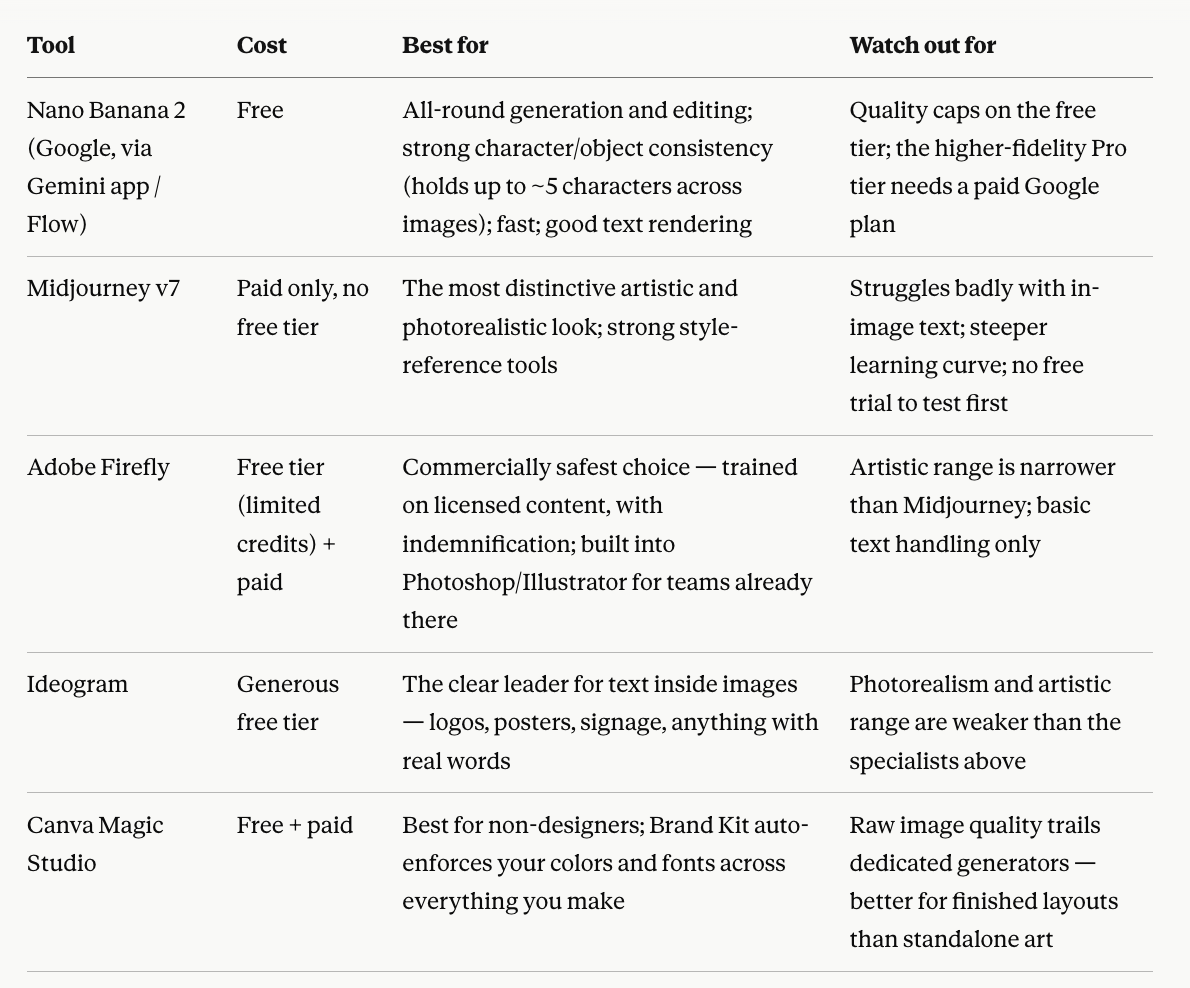
How to actually choose:
How to actually choose: need words in the image → Ideogram. Need it legally airtight for client work → Firefly. Need the most striking artistic look and don't mind paying → Midjourney. Want one free, capable, all-round starting point → Nano Banana 2. Already living inside Canva for everything else → Magic Studio, for the consistency the Brand Kit gives you automatically.
Before you go off and try these yourself, four things to know:
"Consistent" doesn't mean pixel-perfect. Even the best anchor-image workflow won't guarantee an exact hex code or exact logo placement every time. Treat AI output as a strong draft, not a locked final asset — someone should eyeball it against your actual brand guide before it ships.
Commercial rights vary by tool. Firefly is the safest for client or paid commercial work because of its licensed training data. Others carry more legal ambiguity. Check your tool's commercial terms before using output in anything client-facing.
Expect watermarking. Most major tools now embed invisible provenance marks (Google's SynthID, industry-wide C2PA credentials) in anything they generate. This is becoming standard, not a bug — factor disclosure into your process if your platform or company requires it.
Be careful with real people. Generating images of real, identifiable individuals carries extra legal and ethical risk. Avoid it unless you have clear rights and a clear reason.
Go deeper: pick one tool from the table that matches your first real use case. Build one anchor image using the Section 3 method. Generate five images from it before your next post is due.
Nexa's Verdict: Hype 3/5 · Maturity 4/5 — genuinely capable today, moving fast enough that "best tool" answers age in months, not years. The anchor-image habit outlasts every tool update; that's the part worth actually mastering.
Key takeaway
What you now know
A good image prompt has four parts: subject, style, composition, mood — miss one, the model guesses.
Reference images often beat words alone. Upload, don't just describe.
Consistency (social, brand, series) is solved with one habit: build an anchor image, reuse it every time.
Three ways in: from scratch (ideation), editing an existing image (refinement), referencing something (moodboards included).
No single tool wins everything — match the tool to the job, using the table above.
AI output is a strong draft, not a final asset. Check it against your real brand guide before it ships.

Nice work — you've finished the reading
Ready to lock it in? Take the quick quiz and earn your free certificate.
Back to GMAsia Campus